Creating a metronome effect in C#
Metronomes. Key to any aspiring (or even professional) musician. They help you keep in time with the music you’re playing and without it we would be making a complete mess.
So of course Moto needs a metronome, but I thought I would show you the principles behind the somewhat oversimplified code so you can create one in your own project and avoid the pitfalls I fell into.
The finished product
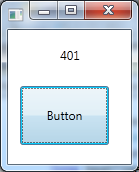
That is literally it. It’s a big button which you click to the beat. The number represents the time between the metronome ticks. It averages out all the times you click and pumps out that number to a dispatcherTimer, but all that’s coming up…
Setting up the XAML
I’ve created this in a WPF window with Visual C# Express, so assuming you’re using that or Visual Studio, go ahead and make one of those. Then you can drag on a button called btnBeat on to your window and a label called lblTiming and you’re ready to go!
The coding ideas
Some people would have different approaches as to how to do this. This is one way which I found to be the most accurate when dealing with milliseconds as you most likely would be if playing a song for example.
There’s a multitude of timers I could have chosen from: System.Timers Timer or System.Windows.Threading DispatcherTimer to name a couple, but there’s a third one that’s been used a bit out of context that needs a bit of explaining.
There’s two timers – one that is used to capture the times between clicks, and another which is the actual metronome ticking away at the speed set by the first timer. The first is actually a System.Diagnostics Stopwatch and the second is a bog-standard DispatcherTimer.
Stopwatch is usually used for benchmarking – timing events within your program to make sure nothing takes too long for your user, or other machines, or something else entirely. It’s usually used for more technical things than learning the timing for a metronome, but it’s the only one that could provide accurate millisecond data for use with the DispatcherTimer.
Timer and DispatcherTimer are only good with keeping vague timings down to 52ms. Anything below that didn’t fire as fast as expected and even things above that didn’t fire dead on when they were supposed to. They are much better used for timings above, say, 100ms. That’s why it’s used for the actual metronome rather than another Stopwatch – well, that and this has a Tick event that fires rather than just the Start and Stop commands of the Stopwatch.
When we stop our Stopwatch, we can get how many milliseconds it has been running for since it was started or restarted (the difference of which we’ll get to in a sec) and from there give our metronome a speed. Let’s delve right into coding that then, shall we?
The code behind
Straight away we’ve got a few variables we need to define:
Stopwatch beatTimer = new Stopwatch(); //Counting the time between clicks
DispatcherTimer metronome = new DispatcherTimer(); //Playing our metronome tick at our generated pace
long beatCount = 0; //How many times have we clicked the button?
long beatTime = 0; //How long should the metronome take between ticks?
long timePile = 0; //Accumulate the time from the Stopwatch

SoundPlayer metronomeTick = new SoundPlayer("metronome-tick.wav"); //Metronome ticking sound
All these are really important, so put them in before doing any of the stuff below.
In our MainWindow() opening class (where the code we need to run at start up is ran) we need to put a reference to a function called setupMetronome() which, as I’m sure you guessed, sets up the metronome:
private void setupMetronome()
{
  metronome.Interval = TimeSpan.FromMilliseconds(1000);
  metronome.Tick += new EventHandler(metronome_Tick);
}

void metronome_Tick(object sender, EventArgs e)
{
  metronomeTick.Play();
}
Here what we’re doing is just giving it a default time of which to tick – once every second – and adding an event listener to listen for that tick. When it ticks, play the ticking noise we defined above. Simples.
Now onto where the beefy stuff happens when you click the button. It’s a bit all over the place, but I’ll explain the best I can:
private void btnBeat_Click(object sender, RoutedEventArgs e)
{
  if (beatTimer.IsRunning)
  {
    beatTimer.Stop();

    //We're listening for beats, do the number crunching
    //Register a click as a beat
    beatCount++;

    //Add time to the time pile
    timePile += beatTimer.ElapsedMilliseconds;

    //Calculate the average time between clicks
    beatTime = timePile / beatCount;

    //Update our readout
    lblTiming.Content = beatTime;

    //If this wasn't the first click, set the metronome appropriately
    if (beatCount > 1)
    {
      setMetronome(beatTime);
    }
  }
  //Start the Stopwatch up again
  beatTimer.Restart();
}
So. First off, if our Stopwatch is currently counting then stop it at this point in time while we crunch some numbers. Then we’re adding 1 to our beatCount which is keeping a score of how many times the button is pressed so we can do some averaging, which is done a few lines down. timePile is literally just adding up all the time we’ve had since our Stopwatch has been running so we can average it out with the number of clicks.
Finally, after we’ve averaged it all out, we’re updating the form to our new beat time and, if this isn’t the first time we clicked on the button (which we do to start the Stopwatch), set the metronome to the averaged speed. When that’s all done restart the Stopwatch.
The difference between beatTimer.Restart() and beatTimer.Start() is that if the Stopwatch is stopped then Restart() will set the milliseconds it’s been runnning back to 0 and start it off again, whereas Start() just starts up again where it left off.
The last bit you need to know is what setMetronome() actually does:
private void setMetronome(double milSec)
{
  metronome.Stop();
  metronome.Interval = TimeSpan.FromMilliseconds(milSec);
  metronome.Start();

  metronomeTick.Play();
}
It takes a time in milliseconds, sets the interval of metronome to that, restarts it and plays a sound just to confirm it’s done that.
And that’s that. It should create a nice and simple metronome effect. It’s aim is to be transferred into Moto and I’ll detail that in another post. But for now you’ve got the basic principles to make one for yourself in whatever situation you require!